Wow, it's been a while! I can't really come up with any clever excuses... I've been cooking a lot of the same recipes lately I guess. This whole gluten free thing is here to stay it seems. I found a new magazine at the library called "Living Without" and it's a gluten free magazine believe it or not! There are lots of dairy free recipes as well, in addition to articles on celiacs, allergies and food sensitivities. Not for everyone, but I found it damn interesting. It was in that very magazine that I found the recipe for this quinoa salad. It originally was called "Quinoa Salad with Chickpeas and Mint" but I made it without the chickpeas and mint due to lack of ingredients. Here it is, as written:
Quinoa Salad with Chickpeas & Mint
1 cup quinoa, thoroughly rinsed
4 small tomatoes
3 tablespoons extra virgin olive oil
2 tablespoons lemon juice
1 tablespoon dijon mustard
2 cloves garlic, peeled and crushed
1/2tsp salt
Freshly ground pepper, to taste
1/4cup kalamata olives
2 cans chickpeas or white beans, rinsed and drained (I wish I had some of these and I usually do! I will add them next time)
1/2cup fresh mint leaves (didn't have any mint leaves)
3 ounces goats feta cheese or dairy-free cheese replacement, optional (I had cow feta)
1. Cook quinoa in plently of gently boiling water for about 12 to 15 minutes or until it softens. Tip quinoa into fine sieve, make several steam holes through it with a skewer and let it drain.
2. Cut the tomatoes in half. Remove the cores and seeds. Chop flesh coarsley. Set aside.
3. Mix the oil, lemon juice, mustard, garlic, salt & pepper in a large bowl. Add the cooked quinoa, black olives and chickpeas.
4. Just before serving, add the tomatoes and mint. Crumble the feta, if using, into the salad. Toss gently and serve.
Next... carrot soup!
I did a quick internet search and this was the first carrot soup recipe that popped up. Here's where I found the original recipe and here is the recipe:
Laura's Carrot Soup
2 cloves garlic, minced
1 onion, chopped (about 1-1/2 cups) (I only had half)
1 rib celery, chopped
2 tablespoons butter or olive oil
1 pound carrots, peeled and sliced
1 large potato, skin on, chopped
4 cups hot water
4 teaspoons instant bouillon (or 1 bouillon cube)
1/2 teaspoon thyme
1/4 teaspoon ground dill
2 teaspoons kosher salt
1/4 teaspoon black pepper
1-1/2 cups skim milk (I only had about 1 cup)
Sauté garlic, onion and celery in butter until tender in a Dutch oven (or a big old pot). Add remaining ingredients except milk. Bring to a boil and cook until carrots are tender, 30 – 40 minutes.
Purée in small batches in a blender or food processor (I used the immersion blender). Return mixture to the cooking pan. Add milk, heat through and serve immediately.
MY REVIEW: It feels good to try something new and share it with you guys! Both of these recipes were great. I would most definitely make the quinoa salad again but this time adding the chickpeas - I'm not sold on the mint though. The soup was fantastic and easy to make. Give it a try.
JASON'S REVIEW: It tasted like a garlicy fairy was dancing and my tongue and it was very delicious.
Showing posts with label celiacs. Show all posts
Thursday, November 11, 2010
Friday, October 29, 2010
Stuffed Acorn Squash
This evenings meal is a compilation of some random things found in the fridge, on the counter, my moms garden and the pantry.
I had a lovely acorn squash sitting on the counter that I knew I wanted to use somehow. Not much for vegetables in the fridge but I knew I wanted to use up some kale from my moms garden this evening. There was also about a cup of cooked rice from last night hanging around. A peek in the pantry produced a can of tomato bisque and chick peas. Since Jason has been eating mostly gluten free and vegetarian as of late, I scrounged around in the freezer and found some ground turkey to add to my concoction. So let's recap....
1 acorn squash, cut in half (insides scooped out), baked for approx 30 minutes at 450F
ground turkey
1 can tomato bisque soup
half a can of chickpeas
1 cup cooked rice
kale, ripped into small pieces
While the squash is roasting in the oven, brown the turkey on the stove top. Add soup, chickpeas, rice and kale. Cover and let simmer until your squash is ready - the flesh should be nice and soft. Scoop some of the turkey mixture into the squash and voila! Be sure to nibble away at the sides of your squash bowl as you eat the turkey-tomato filling.
MY REVIEW: It doesn't look like much but eating half of an acorn squash is FILLING. Not to mention the insides. This is my comfort food. Warm and simple and the house still smells like there's a good cook in the kitchen! I am very happy with this recipe - especially being gluten-free and lactose free. You don't need to dirty a whole bunch of dishes for this one and there's not any chopping involved... well except for the squash I guess but that's easy.
JASON'S REVIEW: Jason is shaving his legs right now (it's a cycling thing) but he really enjoyed this! Once he finished round 1, including the acorn-squash-bowl, he went back for seconds. This is how I know he enjoyed it. He said he's lucky to have someone that cares about his antioxidants.
I had a lovely acorn squash sitting on the counter that I knew I wanted to use somehow. Not much for vegetables in the fridge but I knew I wanted to use up some kale from my moms garden this evening. There was also about a cup of cooked rice from last night hanging around. A peek in the pantry produced a can of tomato bisque and chick peas. Since Jason has been eating mostly gluten free and vegetarian as of late, I scrounged around in the freezer and found some ground turkey to add to my concoction. So let's recap....
1 acorn squash, cut in half (insides scooped out), baked for approx 30 minutes at 450F
ground turkey
1 can tomato bisque soup
half a can of chickpeas
1 cup cooked rice
kale, ripped into small pieces
While the squash is roasting in the oven, brown the turkey on the stove top. Add soup, chickpeas, rice and kale. Cover and let simmer until your squash is ready - the flesh should be nice and soft. Scoop some of the turkey mixture into the squash and voila! Be sure to nibble away at the sides of your squash bowl as you eat the turkey-tomato filling.
MY REVIEW: It doesn't look like much but eating half of an acorn squash is FILLING. Not to mention the insides. This is my comfort food. Warm and simple and the house still smells like there's a good cook in the kitchen! I am very happy with this recipe - especially being gluten-free and lactose free. You don't need to dirty a whole bunch of dishes for this one and there's not any chopping involved... well except for the squash I guess but that's easy.
JASON'S REVIEW: Jason is shaving his legs right now (it's a cycling thing) but he really enjoyed this! Once he finished round 1, including the acorn-squash-bowl, he went back for seconds. This is how I know he enjoyed it. He said he's lucky to have someone that cares about his antioxidants.
Labels:
acorn squash,
celiacs,
gluten free,
ground turkey
Monday, October 25, 2010
Pasta Bake with Roasted Red Pepper & Garlic Sauce
Upon reading that today was 'World Pasta Day', I came up with a grand scheme to use up a whole bunch of vegetables that had been hanging around in the fridge for a while. Dinner tonight had 2 components (meat/sauce & pasta/veggies) but I'll start off with the sauce which was inspired from the recipe found on this website. As I followed it pretty loosely, I'm just going to give it to you as I did it instead of what I changed from the original. Here goes:
Roasted Red Pepper & Garlic Sauce
2 red bell peppers, roasted (instructions follow)
1 clove garlic, roasted
2 sun dried tomatoes, soaked for about 15 minutes in water. Reserve soaking liquid
1 Tbl. balsamic vinegar
1 1/2 tsp. dried oregano
1 tsp. dried basil
Handful of spinach
salt and pepper to taste
If you have never roasted red peppers before, the following instructions from the original recipe are pretty simple to follow. This was only my second attempt and it was much more successful than the first (which didn't even make it to the blog).
To roast peppers and garlic:
Cut peppers in half lengthwise. Remove stems, seeds and ribs. Peel garlic cloves carefully, you want to remove the papery husk without scoring up the clove.
Place peppers, skin side up and garlic cloves on a heavy baking sheet or glass or metal pan that can withstand the heat from the broiler. A pan with sides is best, because a baking sheet can warp from the heat. Place under broiler, and broil until the skin turns black and is pulling away from the peppers. Check the garlic cloves occasionally, and turn them over once. Remove when they are brown and slightly shriveled, but not dried out. The garlic will be done before the peppers. When peppers are blackened, place them in a paper bag while still steaming and sizzling and fold over the top.
Let them sit until they are cool. They will have steamed soft in the bag, and the skins will peel right off.
Once you've got your roasted red peppers and garlic done, combine them with your spices, tomato and balsamic vinegar in a large bowl. Since I was using my immersion blender I had to add the liquid from the tomatoes at this point as well or else everything would splash up onto my face/shirt..... so be sure to put an apron on!! Blend until desired consistency - add more liquid depending on how thick/thin you want the sauce to be. Once I had all of that blended, I decided to throw in a handful of spinach and whip it in there.
Now your sauce is done!
While that was blending that away, I had ground turkey browning on the stove. Once it was cooked, I added my sauce and let it simmer. Here's what it looked like at this point:
In another pot on the stove I had some brown rice pasta boiling away. Once it was about 2 minutes away from being perfect, I put some broccoli and asparagus pieces in the water for the remaining time.
Once the pasta and vegetables are complete, drain them and add to the skillet with the meat and sauce. Combine gently and pour the whole thing into a casserole dish. Top with a little bit of mozzarella and parmesan and put in the oven at 350 for about 10-15 minutes. It may (or may not) look like this when it comes out:
MY REVIEW: This meal pleased me! I've never made a blended pasta sauce before.. I'd always taken the "rustic" approach. The sauce is comprised strictly of vegetables and herbs and it tasted great. It would be suitable for someone on a low-fat diet or a lactose-free diet or a celiac or a diabetic or a vegetarian.... (my fans are an interesting and diverse bunch!). Once mixed into the whole thing, the flavor of the sauce was comfortably present but not overpowering. I'm stoked at the amount of vegetables I was able to cram into this gluten-free dish and it could easily be done with or without meat/cheese according to your tastes.
JASON'S REVIEW: It was very tasty and filling.
Roasted Red Pepper & Garlic Sauce
2 red bell peppers, roasted (instructions follow)
1 clove garlic, roasted
2 sun dried tomatoes, soaked for about 15 minutes in water. Reserve soaking liquid
1 Tbl. balsamic vinegar
1 1/2 tsp. dried oregano
1 tsp. dried basil
Handful of spinach
salt and pepper to taste
If you have never roasted red peppers before, the following instructions from the original recipe are pretty simple to follow. This was only my second attempt and it was much more successful than the first (which didn't even make it to the blog).
To roast peppers and garlic:
Cut peppers in half lengthwise. Remove stems, seeds and ribs. Peel garlic cloves carefully, you want to remove the papery husk without scoring up the clove.
Place peppers, skin side up and garlic cloves on a heavy baking sheet or glass or metal pan that can withstand the heat from the broiler. A pan with sides is best, because a baking sheet can warp from the heat. Place under broiler, and broil until the skin turns black and is pulling away from the peppers. Check the garlic cloves occasionally, and turn them over once. Remove when they are brown and slightly shriveled, but not dried out. The garlic will be done before the peppers. When peppers are blackened, place them in a paper bag while still steaming and sizzling and fold over the top.
Let them sit until they are cool. They will have steamed soft in the bag, and the skins will peel right off.
Once you've got your roasted red peppers and garlic done, combine them with your spices, tomato and balsamic vinegar in a large bowl. Since I was using my immersion blender I had to add the liquid from the tomatoes at this point as well or else everything would splash up onto my face/shirt..... so be sure to put an apron on!! Blend until desired consistency - add more liquid depending on how thick/thin you want the sauce to be. Once I had all of that blended, I decided to throw in a handful of spinach and whip it in there.
Now your sauce is done!
While that was blending that away, I had ground turkey browning on the stove. Once it was cooked, I added my sauce and let it simmer. Here's what it looked like at this point:
In another pot on the stove I had some brown rice pasta boiling away. Once it was about 2 minutes away from being perfect, I put some broccoli and asparagus pieces in the water for the remaining time.
Once the pasta and vegetables are complete, drain them and add to the skillet with the meat and sauce. Combine gently and pour the whole thing into a casserole dish. Top with a little bit of mozzarella and parmesan and put in the oven at 350 for about 10-15 minutes. It may (or may not) look like this when it comes out:
MY REVIEW: This meal pleased me! I've never made a blended pasta sauce before.. I'd always taken the "rustic" approach. The sauce is comprised strictly of vegetables and herbs and it tasted great. It would be suitable for someone on a low-fat diet or a lactose-free diet or a celiac or a diabetic or a vegetarian.... (my fans are an interesting and diverse bunch!). Once mixed into the whole thing, the flavor of the sauce was comfortably present but not overpowering. I'm stoked at the amount of vegetables I was able to cram into this gluten-free dish and it could easily be done with or without meat/cheese according to your tastes.
JASON'S REVIEW: It was very tasty and filling.
Saturday, October 16, 2010
Roasted Squash Soup with Apple & Brie
For lunch today, I made another luscious squash soup. This recipe was from my luscious-soup-recipe-provider, Rachelle (she was the one who gave me the Champagne Squash Soup recipe I made for Thanksgiving). She's really got me on a soup kick with all these fantastic recipes - the cool fall weather doesn't hurt either. I'm also really digging squash lately.
Roasted Squash Soup with Apple & Brie
1 large butternut squash (I used a butterCUP squash)
Roasted Squash Soup with Apple & Brie
1 large butternut squash (I used a butterCUP squash)
1 carrot
1 medium onion
1 leek, white portion only
2 Tbsp butter
6 cups chicken broth
1 apple, peeled and chopped
1 tsp sugar
salt and pepper, to taste
8 oz. brie cheese
diced green onion (garnish) (didn't have any of this)
1) Cut squash in half length-wise and remove seeds. Microwave on high cut-side down in baking dish in a small amount of water, covered, for 10mins.
2) Chop carrot, onion, and leek into 1" pieces and place into a large pot. Gentle saute in butter. Do not brown. Add cooked squash to vegetables (just the squash pulp out of it's skin). Add broth and bring to a boil. Add apple and sugar. Simmer, uncovered, for 40mins. Puree soup in batches.
3) Season with salt and pepper. Slice off rind of brie and cut brie into 1/2" pieces. Place cheese in bottom of soup bowls and fill with hot soup. Garnish with green onion. Serves 4.
MY REVIEW: Great soup. You could do it with or without the brie because it's got a fantastic flavor. It always amazes me how simple vegetables blended together can make such an excellent soup.
Monday, October 11, 2010
Happy Thanksgiving
What a busy long weekend! A wedding on Saturday night, last night a wonderful gluten-free Thanksgiving dinner prepared by my mom and this evening Jason and I cooked a huge chicken for his family. Jason sharpened his carving knife in preparation:
I decorated my red table kitchen:
I lucked out in the beautiful flower department! Jason brought me the orange plant on the left yesterday and the bouquet on the right came from his mom today:
My mom made these colorful little chocolate autumn leaves to put on my table:
This picture is for everyone who doesn't understand what Jason and I do without cable television. Note the 2 chairs:
Check out the huge bird! Jason made his special rub... you'll have to ask him for the recipe. All I know is there's lots of oregano and garlic and it's delicious:
Now as for new recipes, I tried two and both were a success! First off, I found a great recipe for vegetarian gravy that I could easily adapt into a gluten-free/vegetarian gravy. Sadly, I cannot find the original source so don't give me credit for it! Here it is:
Easy Vegetarian Gravy
3 tablespoons margarine
2 tablespoons of finely chopped onions (I left this out for this batch, but will toss it in next time)
2 minced garlic cloves
3 tablespoons flour (gluten-free blend from planet organic)
2 tablespoons soy sauce (gluten-free)
1 cup water
salt and pepper
1 Put margarine in a pot and saute the onions and garlic over med-high heat.
2 Reduce heat back to medium after onions and garlic have become golden brown.
3 Make a roux by gradually adding the flour, while continuously stirring to avoid lumps.
4 Still stirring, add soy sauce and water to the mixture.
5 Add salt and pepper to taste.
6 Once the gravy has reached desired thickness, turn off the stove and you are done!
MY REVIEW: I loved this gravy! The one change I would absolutely make next time would be omitting the salt. Soy sauce has enough salt on its own. Other than that, this was fantastic. I served it to 2 vegetarians this weekend and both seemed to enjoy it.
This next recipe was suggested to me by a friend and her raving reviews gave me the confidence to try it on this special occasion. Usually I'll try something on Jason first but I just went for it with this one and it turned out wonderfully. It's from the Best of Bridge cookbook but I found it on this blog. I forgot to take a picture of it when I served it with the sour cream and nutmeg so here's a picture of the leftovers!:
Champagne Squash Soup
4lbs squash acorn or butternut (I used 2 acorn)
2 medium onions diced (I used 3 small white onions)
2 TBSP butter
1/4 cup of Champagne (I subbed white wine in here)
4-5 cups chicken broth
2 TBSP butter
1/2 tsp nutmeg
salt & pepper to taste
1/4 cup sour cream for garnish
Preheat oven to 350, line a cookie sheet with foil.
Quarter squash, cut out seeds, place skin side up & bake 1- 1 1/2 hours until squash is tender.
Cool. Scoop out pulp & puree.
Saute onions in 2 TBSP butter. Add champagne. Cook until liquid is absorbed, and onions are golden brown stirring often.
Puree onions in food processor with a little of the squash puree.
In large pot, combine onions, squash & broth. Cover & simmer stirring occasionally.
Whisk in 2 TBSP butter.
Season with nutmeg, salt & pepper.
Garnish with sour cream, using knife to swirl through soup.
MY REVIEW: Acorn squash has such a great flavor and it really shines in this soup. Since our blender is no longer functioning, we purchased a hand blender and it made this soup so easy. It was silky smooth!
JASON'S REVIEW: The soup was delicious. It tasted like golden acorn squashes bouncing off my taste-buds with just the right amount of spice.
I decorated my red table kitchen:
I lucked out in the beautiful flower department! Jason brought me the orange plant on the left yesterday and the bouquet on the right came from his mom today:
My mom made these colorful little chocolate autumn leaves to put on my table:
This picture is for everyone who doesn't understand what Jason and I do without cable television. Note the 2 chairs:
Check out the huge bird! Jason made his special rub... you'll have to ask him for the recipe. All I know is there's lots of oregano and garlic and it's delicious:
Now as for new recipes, I tried two and both were a success! First off, I found a great recipe for vegetarian gravy that I could easily adapt into a gluten-free/vegetarian gravy. Sadly, I cannot find the original source so don't give me credit for it! Here it is:
Easy Vegetarian Gravy
3 tablespoons margarine
2 tablespoons of finely chopped onions (I left this out for this batch, but will toss it in next time)
2 minced garlic cloves
3 tablespoons flour (gluten-free blend from planet organic)
2 tablespoons soy sauce (gluten-free)
1 cup water
salt and pepper
1 Put margarine in a pot and saute the onions and garlic over med-high heat.
2 Reduce heat back to medium after onions and garlic have become golden brown.
3 Make a roux by gradually adding the flour, while continuously stirring to avoid lumps.
4 Still stirring, add soy sauce and water to the mixture.
5 Add salt and pepper to taste.
6 Once the gravy has reached desired thickness, turn off the stove and you are done!
MY REVIEW: I loved this gravy! The one change I would absolutely make next time would be omitting the salt. Soy sauce has enough salt on its own. Other than that, this was fantastic. I served it to 2 vegetarians this weekend and both seemed to enjoy it.
This next recipe was suggested to me by a friend and her raving reviews gave me the confidence to try it on this special occasion. Usually I'll try something on Jason first but I just went for it with this one and it turned out wonderfully. It's from the Best of Bridge cookbook but I found it on this blog. I forgot to take a picture of it when I served it with the sour cream and nutmeg so here's a picture of the leftovers!:
Champagne Squash Soup
4lbs squash acorn or butternut (I used 2 acorn)
2 medium onions diced (I used 3 small white onions)
2 TBSP butter
1/4 cup of Champagne (I subbed white wine in here)
4-5 cups chicken broth
2 TBSP butter
1/2 tsp nutmeg
salt & pepper to taste
1/4 cup sour cream for garnish
Preheat oven to 350, line a cookie sheet with foil.
Quarter squash, cut out seeds, place skin side up & bake 1- 1 1/2 hours until squash is tender.
Cool. Scoop out pulp & puree.
Saute onions in 2 TBSP butter. Add champagne. Cook until liquid is absorbed, and onions are golden brown stirring often.
Puree onions in food processor with a little of the squash puree.
In large pot, combine onions, squash & broth. Cover & simmer stirring occasionally.
Whisk in 2 TBSP butter.
Season with nutmeg, salt & pepper.
Garnish with sour cream, using knife to swirl through soup.
MY REVIEW: Acorn squash has such a great flavor and it really shines in this soup. Since our blender is no longer functioning, we purchased a hand blender and it made this soup so easy. It was silky smooth!
JASON'S REVIEW: The soup was delicious. It tasted like golden acorn squashes bouncing off my taste-buds with just the right amount of spice.
Labels:
acorn squash,
celiacs,
gluten free,
gravy,
soup,
thanksgiving,
vegetarian
Sunday, September 19, 2010
Favorite Carrot Glaze & Beer
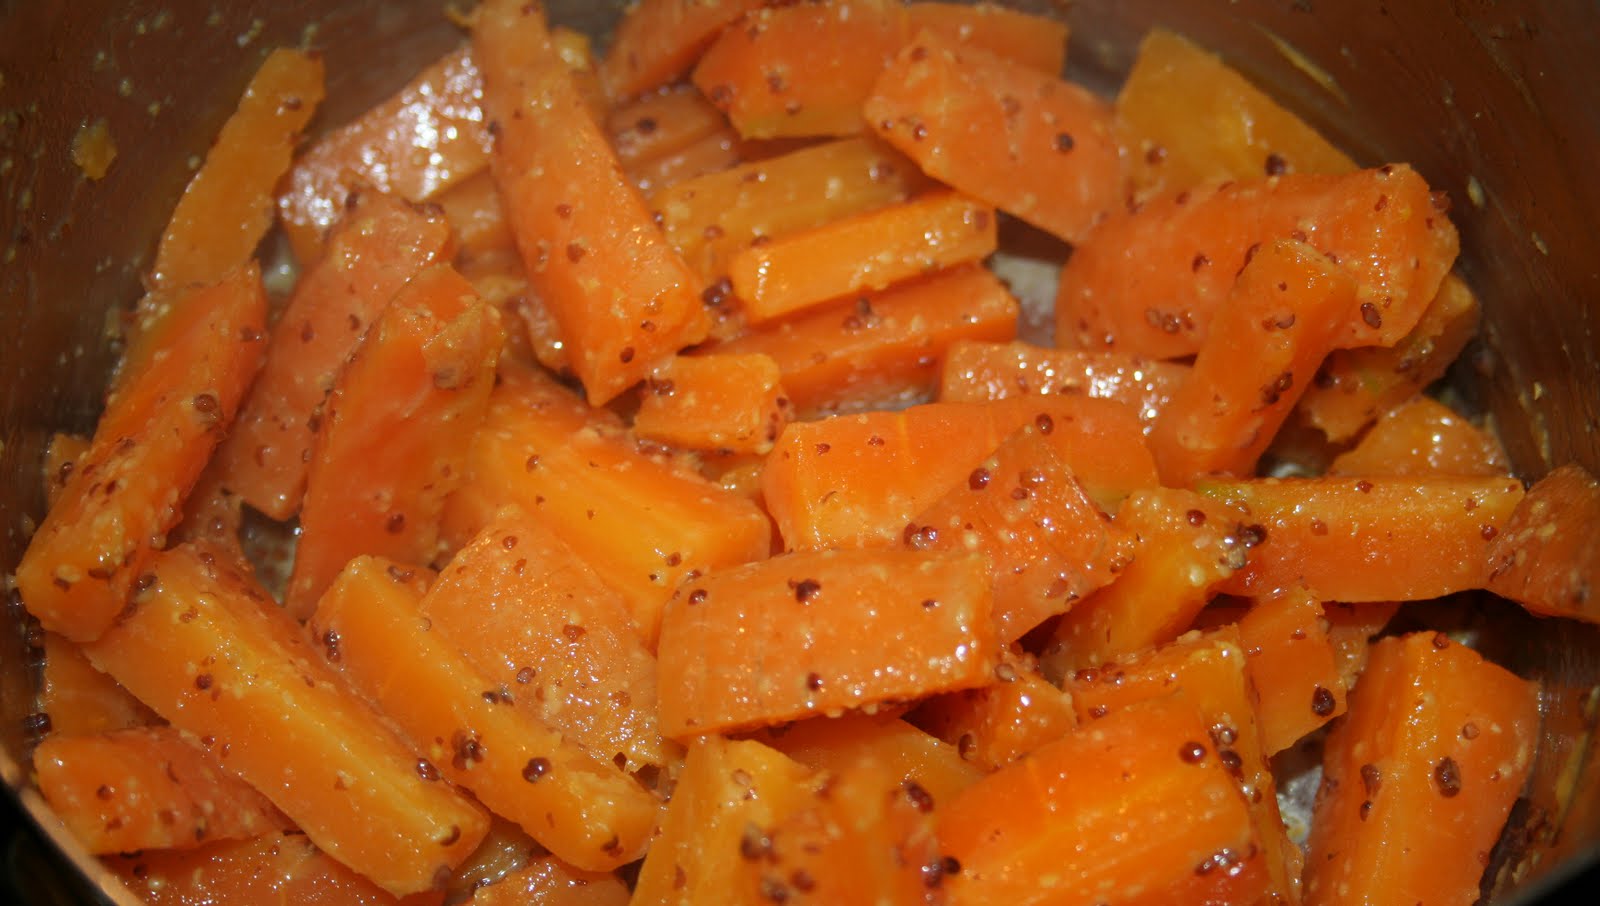
I can't believe I have not posted this recipe yet! Jason requests it basically every night. Our stash of homegrown carrots is diminishing quickly and I don't look forward to going back to store bought. All you need to make this glaze is...
butter (or margerine)
brown sugar
dijon mustard
Just a little of each, melted in the microwave into a smooth sauce and poured on top of some cooked carrots. It's heaven!
In other news, I love(d) beer and had not had one in about 3 months thanks to this crazy celiacs disease. Everyone kept telling me to try gluten free beer but I refused. My beer memories were ripe with tastes fresh from the brewery in Belgium and drinking Peronies next to the leaning tower of Pisa. I had some really great beer memories! I figured gluten-free beer might fade my memories but I caved this weekend. After learning the Sherbrooke Liquor Store had a gluten-free shelf, we decided to make a trip to our favorite beer store for the first time in a long time.
This was my choice. A little more expensive than normal beer.. but Jason paid so I didn't mind. As most gluten-free things, it was DIFFERENT. It was not BAD though. I was actually pleasantly surprised and am happy to say my beer memories have not been erased. If you're interested, Sherbrooke recently did a blog post all about gluten-free beer.
Jason picked some "Wild Honey" for himself! So fitting.
butter (or margerine)
brown sugar
dijon mustard
Just a little of each, melted in the microwave into a smooth sauce and poured on top of some cooked carrots. It's heaven!
In other news, I love(d) beer and had not had one in about 3 months thanks to this crazy celiacs disease. Everyone kept telling me to try gluten free beer but I refused. My beer memories were ripe with tastes fresh from the brewery in Belgium and drinking Peronies next to the leaning tower of Pisa. I had some really great beer memories! I figured gluten-free beer might fade my memories but I caved this weekend. After learning the Sherbrooke Liquor Store had a gluten-free shelf, we decided to make a trip to our favorite beer store for the first time in a long time.
This was my choice. A little more expensive than normal beer.. but Jason paid so I didn't mind. As most gluten-free things, it was DIFFERENT. It was not BAD though. I was actually pleasantly surprised and am happy to say my beer memories have not been erased. If you're interested, Sherbrooke recently did a blog post all about gluten-free beer.
Jason picked some "Wild Honey" for himself! So fitting.
Gluten Free Cookies
Thought I would try some gluten free cookies today since the loaf didn't turn out too bad. This recipe is SUPER easy. I stumbled upon it here and followed it spot on:
John’s Peanut Butter Chocolate Chip Cookies
(Yield:15 – 20 cookies depending on how big you make them)
1 c. creamy peanut butter
1 c. sugar
1 egg
1 egg white
1/2 c. chocolate chips
1. In a large mixing bowl, combine the peanut butter, sugar, and eggs. Stir until the eggs are thoroughly combined with the other ingredients.
2. Stir in the chocolate chips. (I’m not sure why we do this in a separate step, but we do =)
3. Refrigerate the cookie dough for 15 minutes. Turn the oven to 350 degrees F to preheat.
4. Scoop the chilled cookie dough into small balls using a normal eating-sized spoon. Place the cookie dough balls onto a baking sheet about 2 inches apart from each other.
5. Bake cookies at 350 degrees for around 15 minutes. You want to take them out once the tops are getting brown (see picture above). The cookies may still seem a bit soft at this point, but they will harden as they cool.
6. Let the cookies cool for 10 – 15 minutes and then serve with a glass of cold (soy) milk!
MY REVIEW: Wow these are great! Very rich and creamy tasting... hard to eat too many of these. I still can't believe how few ingredients there are in these and neither could Jason. So simple!
JASON'S REVIEW: Pretty effin' good.
John’s Peanut Butter Chocolate Chip Cookies
(Yield:15 – 20 cookies depending on how big you make them)
1 c. creamy peanut butter
1 c. sugar
1 egg
1 egg white
1/2 c. chocolate chips
1. In a large mixing bowl, combine the peanut butter, sugar, and eggs. Stir until the eggs are thoroughly combined with the other ingredients.
2. Stir in the chocolate chips. (I’m not sure why we do this in a separate step, but we do =)
3. Refrigerate the cookie dough for 15 minutes. Turn the oven to 350 degrees F to preheat.
4. Scoop the chilled cookie dough into small balls using a normal eating-sized spoon. Place the cookie dough balls onto a baking sheet about 2 inches apart from each other.
5. Bake cookies at 350 degrees for around 15 minutes. You want to take them out once the tops are getting brown (see picture above). The cookies may still seem a bit soft at this point, but they will harden as they cool.
6. Let the cookies cool for 10 – 15 minutes and then serve with a glass of cold (soy) milk!
MY REVIEW: Wow these are great! Very rich and creamy tasting... hard to eat too many of these. I still can't believe how few ingredients there are in these and neither could Jason. So simple!
JASON'S REVIEW: Pretty effin' good.
Monday, September 13, 2010
Gluten Free & Dairy Free Banana Bread
This day has been a long time coming. It has intimated me for 2 months but tonight I did it.
I baked gluten-free.
And it was weird.
I used a pre-mixed flour blend (from Planet Organic - thanks Kate!) and gluten free baking powder. All of the other ingredients are pretty standard which is exactly what I was looking for. My shelves are not yet stocked with the strange and wonderful potions from the gluten-free world. This bread is not only gluten-free, it's dairy free. My lactose free readers better try this one *wink wink*!
The recipe I used was from this website. Here it is:
I baked gluten-free.
And it was weird.
I used a pre-mixed flour blend (from Planet Organic - thanks Kate!) and gluten free baking powder. All of the other ingredients are pretty standard which is exactly what I was looking for. My shelves are not yet stocked with the strange and wonderful potions from the gluten-free world. This bread is not only gluten-free, it's dairy free. My lactose free readers better try this one *wink wink*!
The recipe I used was from this website. Here it is:
Ingredients
2 cups white rice flour or your favorite simple gluten-free flour blend
1 1/2 tsp. baking powder (Celiacs - double check your baking powder. Not all is gluten free!)
1/2 tsp. baking soda
1/4 tsp. salt
1/2 tsp. ground cinnamon
1/4 tsp. ground nutmeg
2 eggs, beaten
1 1/2 cups mashed, ripe bananas (about 5)
1 cup vanilla infused sugar (leave vanilla bean in sugar overnight and then remove bean) (I used 1/2cup white sugar + 1/2cup brown sugar +1tsp pure vanilla)
1/2 cup canola oil
1 1/2 tsp. baking powder (Celiacs - double check your baking powder. Not all is gluten free!)
1/2 tsp. baking soda
1/4 tsp. salt
1/2 tsp. ground cinnamon
1/4 tsp. ground nutmeg
2 eggs, beaten
1 1/2 cups mashed, ripe bananas (about 5)
1 cup vanilla infused sugar (leave vanilla bean in sugar overnight and then remove bean) (I used 1/2cup white sugar + 1/2cup brown sugar +1tsp pure vanilla)
1/2 cup canola oil
Directions
Preheat oven to 350F. Spray medium bread pan with nonstick cooking spray or grease with margarine and reserve. Combine dry ingredients in a large bowl and then make a well in the center. Add eggs, banana, sugar, and oil to the center and combine them before folding into the rest of the dry ingredients. Pour or spoon batter into your bread pan. Bake for an hour or until a toothpick comes out clean. Cool for a few minutes before removing from pan, and then cool on a wire rack until you can’t stand it any longer.
MY REVIEW: So lets start with the smell - it was all good and normal. The final appearance resembled gluten-filled loaves I've made in the past as well. The taste ... it was decent - kind of soggy because I may have added too many bananas. The texture was weird but I will admit, I gobbled it up as I haven't had anything fresh baked from the oven in a long time. I don't really know what to say about this. I know it will get eaten. At least it wasn't a TOTAL flop because I probably would have given up baking gluten-free on the spot. I can work with this result.
JASON'S REVIEW: It was grainy and had a weird texture but it tasted good.
Labels:
banana,
bread,
celiacs,
gluten free,
lactose free
Sunday, August 22, 2010
A few things this weekend
I'm a little behind in my blog writing but lets start with Saturday morning. It's a rare occasion that we have a fancy breakfast. If it's during the week, it would only be for someones birthday. Sometimes on the weekends though I'll wake up in a cooking mood. Yesterday was one of those rare mornings!
No fancy recipes here. Scrambled eggs full of veggies - zucchini, orange pepper, mushroom & onion. I made some crispy dill potatoes too. After much trial and error I've found *what I think* is the best method for making crispy hash-brown-like potatoes. After boiling them until they're tender, I put the potatoes in the oven with some olive oil and dill and cook them for another 15 minutes or so at 400. The secret is to use the convect setting on the oven though! It leaves the inside soft while crisping up the outside.
I "toasted" some gluten-free bread in the oven as well. It's just easier if both Jason and I are eating the same bread and using the same knife so I treated him to some amazing Udi white bread.
My mom purchased this bread for me first and it's honestly better than any gluten-filled bread I've ever had. I'm hooked on the plain white bread which is usually not what I go for - but damn. It tastes like it was just baked. I've also tried the blueberry muffins which were awesome.
We also had chai tea!
JASON'S REVIEW: That was the best start to the day I've had in a long time. The potatoes tasted like sweet tuber heaven.
MY REVIEW: I agree with Jason.. except for the tuber part?
Now moving right along to Saturday evening. I had wanted to make skewers but the skewer sticks are temporarily missing. Instead, we used our little grill bowl to make veggies on the BBQ.
A little olive oil with salt and pepper is all I added to these vegetables.
JASON'S REVIEW: They were tasty.
MY REVIEW: The fresh pineapple was my favorite. The salt & pepper do not ruin the flavor.
Last, but not least, this evening we had a fantastic meal. I found some gluten free butter chicken sauce that comes in a jar. It's a lite sauce as well and for some reason can't find it on the Sharwood website - but you can find it at Safeway.
I can no longer find the recipe that inspired this salad so don't give me FULL credit for it! Here's what's in it:
mixed greens
2 sliced pears
crumbled gorgonzola cheese
dried cranberries
walnut pieces
Dressing
rice vinegar
olive oil
lemon juice
salt
pepper
Again, no measurements. I hope nobody just skims over my vague recipes and refuses to try them because I never write measurements. Tell me if you do! Please? I'll try harder.
MY REVIEW: I am on such a moldy cheese kick! This was great. Rice vinegar worked very will on this salad too.
JASON'S REVIEW: He's doing laundry so I don't want to bother him anymore. He liked it! He probably thought it was tasty!
No fancy recipes here. Scrambled eggs full of veggies - zucchini, orange pepper, mushroom & onion. I made some crispy dill potatoes too. After much trial and error I've found *what I think* is the best method for making crispy hash-brown-like potatoes. After boiling them until they're tender, I put the potatoes in the oven with some olive oil and dill and cook them for another 15 minutes or so at 400. The secret is to use the convect setting on the oven though! It leaves the inside soft while crisping up the outside.
I "toasted" some gluten-free bread in the oven as well. It's just easier if both Jason and I are eating the same bread and using the same knife so I treated him to some amazing Udi white bread.
My mom purchased this bread for me first and it's honestly better than any gluten-filled bread I've ever had. I'm hooked on the plain white bread which is usually not what I go for - but damn. It tastes like it was just baked. I've also tried the blueberry muffins which were awesome.
We also had chai tea!
JASON'S REVIEW: That was the best start to the day I've had in a long time. The potatoes tasted like sweet tuber heaven.
MY REVIEW: I agree with Jason.. except for the tuber part?
Now moving right along to Saturday evening. I had wanted to make skewers but the skewer sticks are temporarily missing. Instead, we used our little grill bowl to make veggies on the BBQ.
A little olive oil with salt and pepper is all I added to these vegetables.
JASON'S REVIEW: They were tasty.
MY REVIEW: The fresh pineapple was my favorite. The salt & pepper do not ruin the flavor.
Last, but not least, this evening we had a fantastic meal. I found some gluten free butter chicken sauce that comes in a jar. It's a lite sauce as well and for some reason can't find it on the Sharwood website - but you can find it at Safeway.
I can no longer find the recipe that inspired this salad so don't give me FULL credit for it! Here's what's in it:
mixed greens
2 sliced pears
crumbled gorgonzola cheese
dried cranberries
walnut pieces
Dressing
rice vinegar
olive oil
lemon juice
salt
pepper
Again, no measurements. I hope nobody just skims over my vague recipes and refuses to try them because I never write measurements. Tell me if you do! Please? I'll try harder.
MY REVIEW: I am on such a moldy cheese kick! This was great. Rice vinegar worked very will on this salad too.
JASON'S REVIEW: He's doing laundry so I don't want to bother him anymore. He liked it! He probably thought it was tasty!
Wednesday, August 18, 2010
Dinner & First Aid
As most of you know, Wednesday is Jason's group bike ride so I like to make him something special for when he gets home. I was cooking away when he phoned and requested 2 ice packs be ready upon his arrival. Dinner was JUST about on the table when Jason showed up and and out came the first aid kit. He has some pretty impressive wounds (he'll show you the pictures if you ask!) which he cleaned and I taped up as best I could. A few years ago we went to a hypochondriacs estate sale and now have a fairly extensive first aid section in our home, thankfully. By the time we got around to eating dinner, it was cold and probably had been licked by the cat a few times.
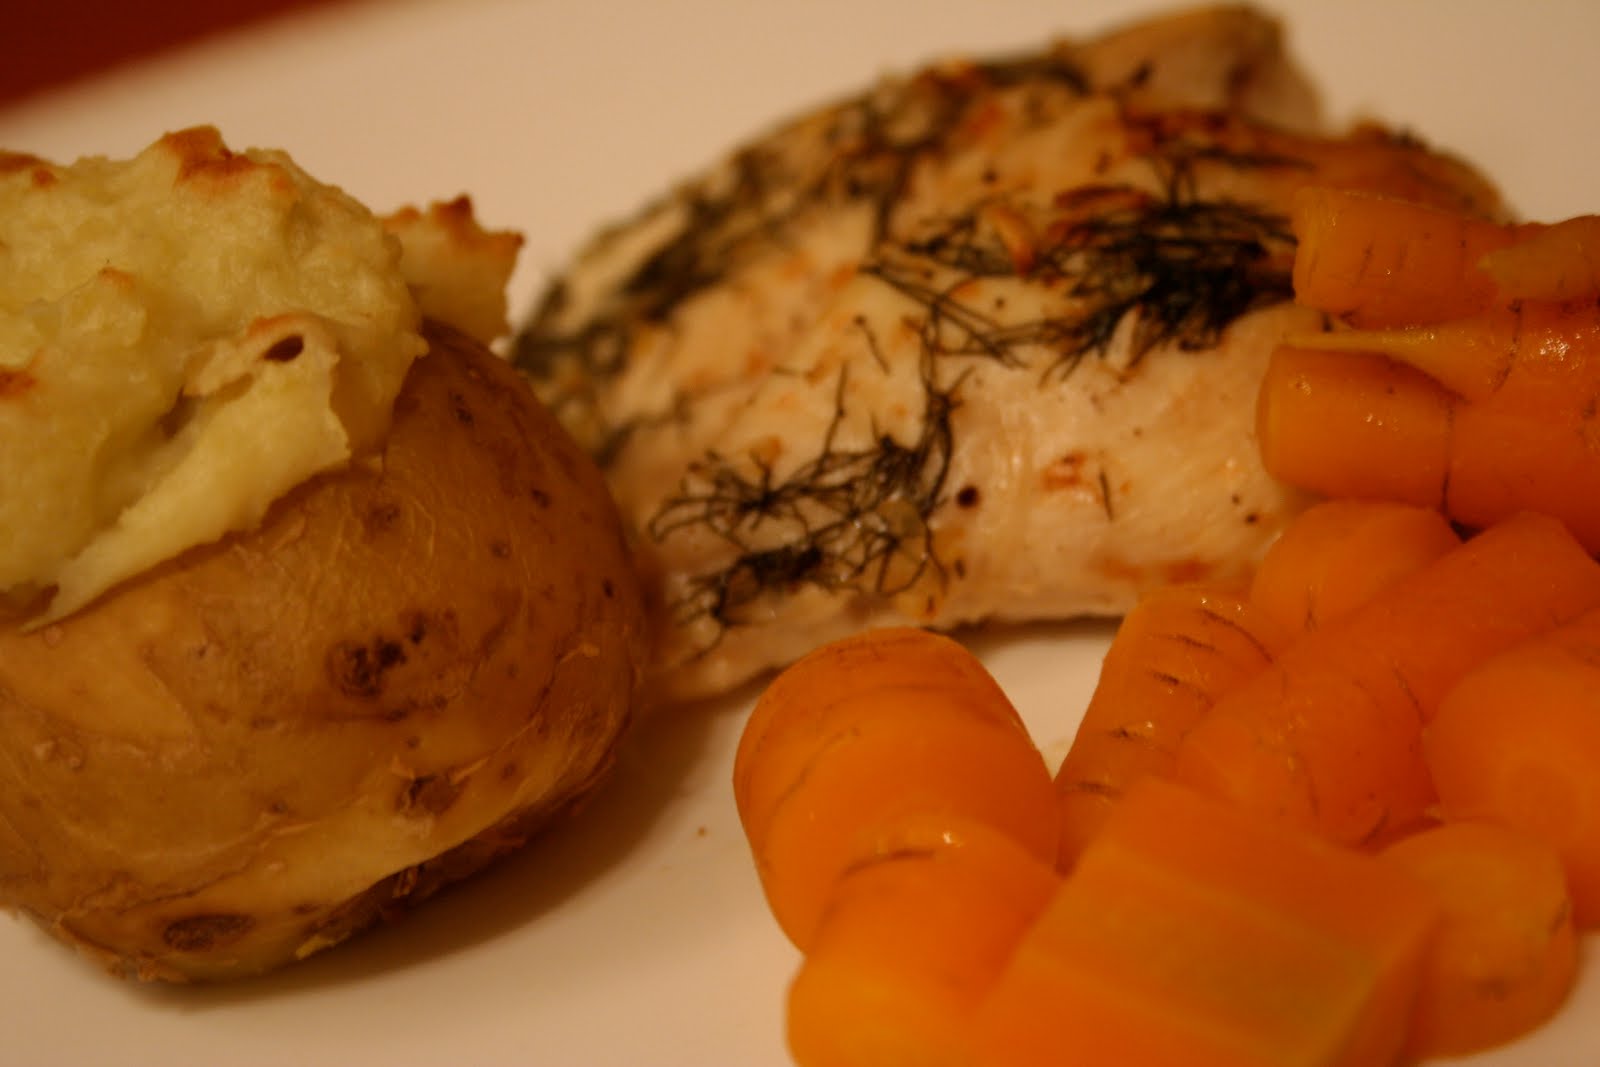
I made salmon for myself and chicken for Jason. On both I used a mixture of olive oil, fresh dill, garlic, lemon juice, kosher salt and pepper. To go with that I made some carrots, fresh from the garden, glazed with honey.
My mom gave me the idea to make a stuffed baked potato. For the insides I used a mixture of gorgonzola, fresh chives and a splash of milk. My kitchenaid whipped it all up nice and smooth. The insides went back into the potato and then I let them brown under the broiler.
MY REVIEW: The potato was yummy. Does anyone else think gorgonzola sort of gives things a strong mushroomy taste?
JASON'S REVIEW: I felt my wounds healing as I ate the delectable chicken, vegetables and fluffy savory potato.
PS - This is my favorite stray cat! She's so tiny and very camera shy but is such a sweetheart. She always has such a concerned look on her face but will let her guard down for a quick scratch on the head. I used to hide the fact I fed stray cats from Jason. It is no longer a secret.
I made salmon for myself and chicken for Jason. On both I used a mixture of olive oil, fresh dill, garlic, lemon juice, kosher salt and pepper. To go with that I made some carrots, fresh from the garden, glazed with honey.
My mom gave me the idea to make a stuffed baked potato. For the insides I used a mixture of gorgonzola, fresh chives and a splash of milk. My kitchenaid whipped it all up nice and smooth. The insides went back into the potato and then I let them brown under the broiler.
MY REVIEW: The potato was yummy. Does anyone else think gorgonzola sort of gives things a strong mushroomy taste?
JASON'S REVIEW: I felt my wounds healing as I ate the delectable chicken, vegetables and fluffy savory potato.
PS - This is my favorite stray cat! She's so tiny and very camera shy but is such a sweetheart. She always has such a concerned look on her face but will let her guard down for a quick scratch on the head. I used to hide the fact I fed stray cats from Jason. It is no longer a secret.
Monday, August 16, 2010
Baked Gnocchi in Tomato Gorgonzola Sauce
Last Friday we went out for dinner to The Melting Pot had they had a to-die-for Gorgonzola dip. It was creamy and had these little bits of strong cheese speckled throughout. As we like to try new cheeses every so often, we decided to ask for a chunk at our weekly visit to the Italian Market. When the deli guy brought us a package of moldy cheese, we were slightly taken aback but took the plunge. We've never actually bought blue cheese or any sort of moldy cheese but recently discovered we DO enjoy it when others add it to food! This was a big step in the world of cheese for us. During this same visit to the Italian Market I found gluten free gnocchi which was made in Italy so I had to pick that up as well.
Now to find the perfect recipe. Gnocchi, Gorgonzola and I pretty much have to use zucchini everyday for the next few weeks. I lucked out and found this great recipe I could easily add zucchini to on the Canadian Living website:
Ingredients
2 pkg (each 500 g) fresh gnocchi (I halved everything.. so 1pkg gnocchi for me)
1 tbsp butter, melted
6oz gorgonzola cheese or fontinacheese, crumbled or cubed (I, of course, used gorgonzola and only used a little bit. About half the size of a deck of cards. I didn't want to overdo it my first time cooking with moldy cheese!)
1 can (796 mL) diced tomatoes (half a can)
1/4 tsp pepper
1/4 cup grated Parmesan cheese (I just sprinkled.. probably not this much)
1/4 cup chopped fresh parsley
Preparation:
In large pot of boiling salted water, cook gnocchi until tender, about 6 minutes; drain and return to pot.
Add butter, Gorgonzola cheese, tomatoes and pepper; stir to coat. Pour into 10-cup (2.5 L) casserole dish; sprinkle with Parmesan and parsley. (Make-ahead: Cover and refrigerate for up to 8 hours.)
Bake, uncovered, in 400°F (200°C) oven until bubbly, about 45 minutes.
To go with this, carrots and peas. Why not?
MY REVIEW: Was this ever good! Good smelling, good looking, good tasting. It was extremely easy to make and I would make sure to add the zucchini if I did it again! We did enjoy the extra little zing from the cheese but I do think this would be just as tasty without if you're not down with the mold. I've never really been crazy for boiled gnocchi but baked gnocchi is a whole new world!
JASON'S REVIEW: I like moldy cheese. You're the best.
Now to find the perfect recipe. Gnocchi, Gorgonzola and I pretty much have to use zucchini everyday for the next few weeks. I lucked out and found this great recipe I could easily add zucchini to on the Canadian Living website:
Ingredients
2 pkg (each 500 g) fresh gnocchi (I halved everything.. so 1pkg gnocchi for me)
1 tbsp butter, melted
6oz gorgonzola cheese or fontinacheese, crumbled or cubed (I, of course, used gorgonzola and only used a little bit. About half the size of a deck of cards. I didn't want to overdo it my first time cooking with moldy cheese!)
1 can (796 mL) diced tomatoes (half a can)
1/4 tsp pepper
1/4 cup grated Parmesan cheese (I just sprinkled.. probably not this much)
1/4 cup chopped fresh parsley
Chopped Zucchini - Not in the original, but works fantastically!
Preparation:
In large pot of boiling salted water, cook gnocchi until tender, about 6 minutes; drain and return to pot.
Add butter, Gorgonzola cheese, tomatoes and pepper; stir to coat. Pour into 10-cup (2.5 L) casserole dish; sprinkle with Parmesan and parsley. (Make-ahead: Cover and refrigerate for up to 8 hours.)
Bake, uncovered, in 400°F (200°C) oven until bubbly, about 45 minutes.
To go with this, carrots and peas. Why not?
MY REVIEW: Was this ever good! Good smelling, good looking, good tasting. It was extremely easy to make and I would make sure to add the zucchini if I did it again! We did enjoy the extra little zing from the cheese but I do think this would be just as tasty without if you're not down with the mold. I've never really been crazy for boiled gnocchi but baked gnocchi is a whole new world!
JASON'S REVIEW: I like moldy cheese. You're the best.
Saturday, August 14, 2010
Food Lately
Lately, we've been living off the garden. Lots and lots of zucchini:
Our pumpkin went a little wild and may have cross polinated with the zucchini. It ventured through the fence into our neighbours yards on both sides:
I've tried a few different things with the zucchini. For lunch today we had left over quinoa with thinly sliced zucchini and onion from the garden that had been sauteed in butter with a little lemon juice. I melted some asiago cheese on top as that's my new addiction:
Actually quinoa is kind of an addiction lately too. I like to have it in the fridge as you can pretty much throw anything in there and eat it hot or cold. A tiny bit of red curry paste on quinoa is becoming a staple for me.
This evening for dinner I tried another zucchini recipe that featured... you guessed it... asiago!
Ingredients
2 medium zucchini , sliced in half lengthwise (I used half of one monster zucchini and we still have leftovers)
2 -3 garlic cloves finely chopped
1 tablespoon fresh lemon juice
1/2 cup asiago cheese grated (parmesan will also work)
3 tablespoons olive oil
salt and pepper , to taste
Directions
JASON'S REVIEW: Epic taste. Crazy squeak. 10 stars.. out of 9.
Our pumpkin went a little wild and may have cross polinated with the zucchini. It ventured through the fence into our neighbours yards on both sides:
I've tried a few different things with the zucchini. For lunch today we had left over quinoa with thinly sliced zucchini and onion from the garden that had been sauteed in butter with a little lemon juice. I melted some asiago cheese on top as that's my new addiction:
Actually quinoa is kind of an addiction lately too. I like to have it in the fridge as you can pretty much throw anything in there and eat it hot or cold. A tiny bit of red curry paste on quinoa is becoming a staple for me.
This evening for dinner I tried another zucchini recipe that featured... you guessed it... asiago!
Ingredients
2 medium zucchini , sliced in half lengthwise (I used half of one monster zucchini and we still have leftovers)
2 -3 garlic cloves finely chopped
1 tablespoon fresh lemon juice
1/2 cup asiago cheese grated (parmesan will also work)
3 tablespoons olive oil
salt and pepper , to taste
Directions
- Heat olive oil in a frying pan on medium heat.
- Score zucchinis, add a squeeze of lemon juice and add salt and pepper lightly. Let marinate for a few minutes.
- Add garlic bits to the olive oil.
- Brown both sides of zucchinis in the garlic and oil.
- Sprinkle asiago cheese on cut side of zucchinis and oven broil on a cookie sheet until cheese browns.
- Serve while warm.
JASON'S REVIEW: Epic taste. Crazy squeak. 10 stars.. out of 9.
Monday, August 2, 2010
Quinoa Salad
This evening I had my mom and dad over for supper. We made some turkey burgers... basically the same ingredients as my Feta Stuffed Meatloaf but I just mixed the feta right in with everything. I was a little concerned that they wouldn't stay together on the grill but the cornmeal did bind it together very well.
To go with our burgers I made the same Caesar Salad Dressing from last night - this time Jason BBQ'd some bacon to sprinkle on top for those of us who could indulge.
Although it's nice to stick with recipes you know when someone is coming over for dinner, I really wanted to try making a quinoa salad. It seems to be the ultimate food for a celiac/vegetarian and I happened to have a bag of it in the pantry. As I'm finding with most recipes lately, there's always something I can't have so I just end up making my own creation. Here's my quinoa salad creation:
Quinoa Salad
1 1/2 cups quinoa, rinsed
3 cups water
chopped english cucumber
2 chopped roma tomatoes
1/4 of an avocado (you can use more assuming you'll actually have a ripe one! I cut up a bit of mine but it sadly, it was pretty hard still so I put the rest in the fridge)
To go with our burgers I made the same Caesar Salad Dressing from last night - this time Jason BBQ'd some bacon to sprinkle on top for those of us who could indulge.
Although it's nice to stick with recipes you know when someone is coming over for dinner, I really wanted to try making a quinoa salad. It seems to be the ultimate food for a celiac/vegetarian and I happened to have a bag of it in the pantry. As I'm finding with most recipes lately, there's always something I can't have so I just end up making my own creation. Here's my quinoa salad creation:
Quinoa Salad
1 1/2 cups quinoa, rinsed
3 cups water
chopped english cucumber
2 chopped roma tomatoes
1/4 of an avocado (you can use more assuming you'll actually have a ripe one! I cut up a bit of mine but it sadly, it was pretty hard still so I put the rest in the fridge)
half a can of chickpeas, rinsed
chopped dill
chopped parsley
kosher salt
fresh ground pepper
splash of olive oil
a couple squirts of lime juice
To cook the quinoa, put it in a pot with the water and bring to a boil on the stove. Once it reaches a boil turn the heat to low, cover and let rest for about 20 minutes. When you take the lid off you will be SHOCKED to find it has doubled in size and it will need to be fluffed with a fork. Let it cool before adding all of your chopped veggies, chickpeas, spices and oil. I do apologize for the lack of measurements. I just kept adding things and tasting until it was good so you will have to do the same!
This made a whole lot of quinoa.... like we're talking it could have fed probably 8 people. So cut it down if you're not feeding that many people but I do think the leftovers are going to make a fabulous lunch. I also left some of the quinoa aside so I could make another cold salad this week. In case you're wondering what that dark pupley blue thing is in the corner - we roasted some blue bird peppers and had a piece left over so I threw it in the mix for our lunches.
MY REVIEW: This was delicious! Things have been turning out lately when I just trust my instinct and go with the flow. Eating gluten free forces you to create your own recipes and improvise and it's been kind of fun. I was happy to share a new seed with my family tonight!
JASON'S REVIEW: A tasty melange.
Warm Beet Salad, Ceasar Salad & Sangrias
I have made sangrias before but can't seem to find my own post on it so I'll share it again! You can adapt this recipe to use any fruits you have in the fridge but here's what I used:
Sangria
1 bottle red wine
splash of cointreau
approx. 1tbsp sugar
lime slices
lemon juice
blueberries
strawberries
raspberries
1 bottle tonic water
Combine everything except the tonic water and let sit in the fridge as long as you can. Mine was only in there for a few hours but I know some recipes recommend overnight. When you're ready to serve, fill your glass half full of the sangria mixture and top off with tonic water.
I know last time I made this I used gingerale instead of tonic but I preferred the tonic as it wasn't so sweet. The good thing about this recipe is you can use the cheapest red wine you can find and it will still taste fabulous. All the colors and fruits just remind me of summer. I have also made a white wine sangria before, in just the same way, but prefer the taste of red better.
We BBQ'd some Freybe Sausages for dinner last night - turkey chicken with tequila and habanero peppers! They had a nice heat to them and the best part was the reading this off their website:
"Prepared in our spotless, state-of-the-art facility, our expert meisters draw on six generations of knowledge, craftsmanship and care; using only the finest ingredients to create award-winning deli meats of the highest quality for your family. Gluten and lactose free (except for British Bangers, Cheese Smokies, and Parmesano Salami), Freybe products are healthy choices with no artificial flavors."
To go with the sausages, I wanted to use some of the veggies from our garden. We have some beautiful heads of romaine so I started searching for a gluten free Caesar salad recipe. I ended up using one from a Jean Pare book and simply left out the Worcestershire sauce. I halved the recipe for the 2 of us:
Ceasar Salad Dressing
1/2cup grated Parmesan cheese
1.5tbsp oil oil
1.5tbsp sour cream
0.5tbsp white (or red) wine vinegar (I used rice vinegar)
0.5tsp lemon juice
0.5tsp Worcestershire sauce (omit if you're eating gluten free)
garlic salt
pepper
Combine all ingredients and let chill for 10 minutes to blend flavors. At this point, if it wasn't approx 30 degrees Celsius in your kitchen, I'm sure you could fry up some bacon or make some croutons for a real Caesar salad. If you find yourself melting from the heat however, just serve it as is and it will still taste great!
Our beets are doing better this year than ever before! I made another original recipe after reading a bunch online and never having ALL the right ingredients. Here's what I came up with:
Beet & Beet Green Salad with a Walnut Vinegrette and Feta
4 medium sized beets & greens
walnut oil (this was purchased at the Italian Market for $7.99 and is 100% walnuts!)
balsamic vinegar
kosher salt
fresh ground pepper
walnut pieces
feta cheese
Make a dressing using equal parts walnut oil and balsamic vinegar. Season with salt and pepper and put to the side.
Cut the greens off your beets and set aside. Cut each beet in half lengthwise and set in a single layer in a shallow baking dish. Fill the dish with water so it's just covering the beets and cover with aluminum foil (or a lid). Cook in the oven for about 30-40 minutes at 400F, convection. Once you can easily poke with a knife, they're done. Splash them with cold water and now you can EASILY remove the skin! *Using this method of cooking and peeling produced the best cooked beets I've ever made*
At this point, mix your beet greens with about half the dressing and wilt in a skillet over medium heat for a few minutes. Chop into smaller pieces and spread out on a plate. Top with chunks of the beet and drizzle the remaining dressing over top of this. Sprinkle feta cheese and walnut pieces to finish.
MY REVIEW: This was a hugely filling dinner. The beets weren't as bursting with flavor as I expected but still very good. I will forever cook my beets in that way as they were done to perfection. The Caesar salad dressing was very good as one would expect with so much cheese! Sangria has become a summer staple and it was just perfect on such a hot day.
JASON'S REVIEW: It was fabulous. The salad was crunchy and delicious. The ceasar was also fabulous. I'd eat the weiners again. The sangria was delicious.
Sangria
1 bottle red wine
splash of cointreau
approx. 1tbsp sugar
lime slices
lemon juice
blueberries
strawberries
raspberries
1 bottle tonic water
Combine everything except the tonic water and let sit in the fridge as long as you can. Mine was only in there for a few hours but I know some recipes recommend overnight. When you're ready to serve, fill your glass half full of the sangria mixture and top off with tonic water.
I know last time I made this I used gingerale instead of tonic but I preferred the tonic as it wasn't so sweet. The good thing about this recipe is you can use the cheapest red wine you can find and it will still taste fabulous. All the colors and fruits just remind me of summer. I have also made a white wine sangria before, in just the same way, but prefer the taste of red better.
We BBQ'd some Freybe Sausages for dinner last night - turkey chicken with tequila and habanero peppers! They had a nice heat to them and the best part was the reading this off their website:
"Prepared in our spotless, state-of-the-art facility, our expert meisters draw on six generations of knowledge, craftsmanship and care; using only the finest ingredients to create award-winning deli meats of the highest quality for your family. Gluten and lactose free (except for British Bangers, Cheese Smokies, and Parmesano Salami), Freybe products are healthy choices with no artificial flavors."
To go with the sausages, I wanted to use some of the veggies from our garden. We have some beautiful heads of romaine so I started searching for a gluten free Caesar salad recipe. I ended up using one from a Jean Pare book and simply left out the Worcestershire sauce. I halved the recipe for the 2 of us:
Ceasar Salad Dressing
1/2cup grated Parmesan cheese
1.5tbsp oil oil
1.5tbsp sour cream
0.5tbsp white (or red) wine vinegar (I used rice vinegar)
0.5tsp lemon juice
0.5tsp Worcestershire sauce (omit if you're eating gluten free)
garlic salt
pepper
Combine all ingredients and let chill for 10 minutes to blend flavors. At this point, if it wasn't approx 30 degrees Celsius in your kitchen, I'm sure you could fry up some bacon or make some croutons for a real Caesar salad. If you find yourself melting from the heat however, just serve it as is and it will still taste great!
Our beets are doing better this year than ever before! I made another original recipe after reading a bunch online and never having ALL the right ingredients. Here's what I came up with:
Beet & Beet Green Salad with a Walnut Vinegrette and Feta
4 medium sized beets & greens
walnut oil (this was purchased at the Italian Market for $7.99 and is 100% walnuts!)
balsamic vinegar
kosher salt
fresh ground pepper
walnut pieces
feta cheese
Make a dressing using equal parts walnut oil and balsamic vinegar. Season with salt and pepper and put to the side.
Cut the greens off your beets and set aside. Cut each beet in half lengthwise and set in a single layer in a shallow baking dish. Fill the dish with water so it's just covering the beets and cover with aluminum foil (or a lid). Cook in the oven for about 30-40 minutes at 400F, convection. Once you can easily poke with a knife, they're done. Splash them with cold water and now you can EASILY remove the skin! *Using this method of cooking and peeling produced the best cooked beets I've ever made*
At this point, mix your beet greens with about half the dressing and wilt in a skillet over medium heat for a few minutes. Chop into smaller pieces and spread out on a plate. Top with chunks of the beet and drizzle the remaining dressing over top of this. Sprinkle feta cheese and walnut pieces to finish.
MY REVIEW: This was a hugely filling dinner. The beets weren't as bursting with flavor as I expected but still very good. I will forever cook my beets in that way as they were done to perfection. The Caesar salad dressing was very good as one would expect with so much cheese! Sangria has become a summer staple and it was just perfect on such a hot day.
JASON'S REVIEW: It was fabulous. The salad was crunchy and delicious. The ceasar was also fabulous. I'd eat the weiners again. The sangria was delicious.
Thursday, July 29, 2010
Figs
** I just entered this photo into a gluten-free photo contest!! Wish me luck! **
Lately I've been reading a lot about figs. Not on purpose - the subject just seems to pop up in the books I've been reading lately. My big plan was to make a blackberry sauce to go on roasted chicken tonight but couldn't find any decent looking blackberries... and then figs popped up! A neat little bag of figs called to me from next to the berries. Seeing as how I've only had figs once (on a sandwich at Earls about a year ago), I used the tips and ideas found on the back of the bag to make my dessert. It suggested dipping the figs in some chocolate and then coated them with crushed nuts. Turns out I had a 85% chocolate bar in the fridge that I was not really digging so I figured that would be just the thing to coat my little figs in. I crushed up some walnut pieces to roll them in after and voila:
Four lovely little figs dipped in chocolate and coated in walnut pieces. I love the crunchy little bits inside the figs and the completely natural sweetness. They were pretty good but better yet, good FOR you. Figs and I have a very bright future. The fruit and vegetable section is my safety zone at the grocery store now. I'm completely free to try anything I like and I don't have to waste my time reading labels. It's 100% less stressful than eating out!
Who knew the day would come when I would appreciate cooking and cleaning my own kitchen more than letting someone else take care of it? Making my own food and cleaning my own mess is the most re-assuring thing I can do at this time. I know exactly what's going in my belly and my belly thanks me everyday.
Oh and in case you're wondering what I had instead of blackberry sauce on roasted chicken.... nachos (que paso brand is gluten free) made in the microwave with tomatoes, olives and guacamole. It seems pretty weak in comparison but I'm kind of glad I couldn't find those damn blackberries. It's way to hot to turn the oven on!
Tuesday, July 27, 2010
Two meals for you to feast (your eyes) on
Both last nights meal and this evenings were inspired by a book my mom gave me called "Cooking Under the Arch - Cherished Recipes and Gardening Tips from the Rigorous High Country of Alberta's Chinook Zone".
It's just got really simple ideas on how to use the fruits and vegetables from your garden.
Last night, I made something called "Zucchini Ratatouille". Here's the recipe as written in the book:
These vegetables are straight from your garden, not dolled up with eggplant or mushrooms, though there is no law against those.
Cut in chunks into a baking dish: Zucchini, potatoes, carrots, onions, tomatoes. Drizzle with olive oil, fresh or dried oregano, garlic, salt and pepper. Cover and bake at 180C for 45 minutes. Top with cheddar or mozzarella and parmesan. Bake uncovered a few minutes until melted.
I followed this recipe pretty closely... the only thing that I found way off was the time! I had to leave it in there for almost 2 hours until the potatoes were cooked. I also added some sweet potato and cooked chicken from the night before. May I also add... the oregano and zucchini were from my garden! The potatoes and carrots were from someone elses garden. The joys of summer! This was a fantastic meal and great leftovers for lunch.
This evening I had to hang up my ring and get dirty! I made a completely original recipe that I am very excited about. It's all natural and completely gluten free. Drum roll please....
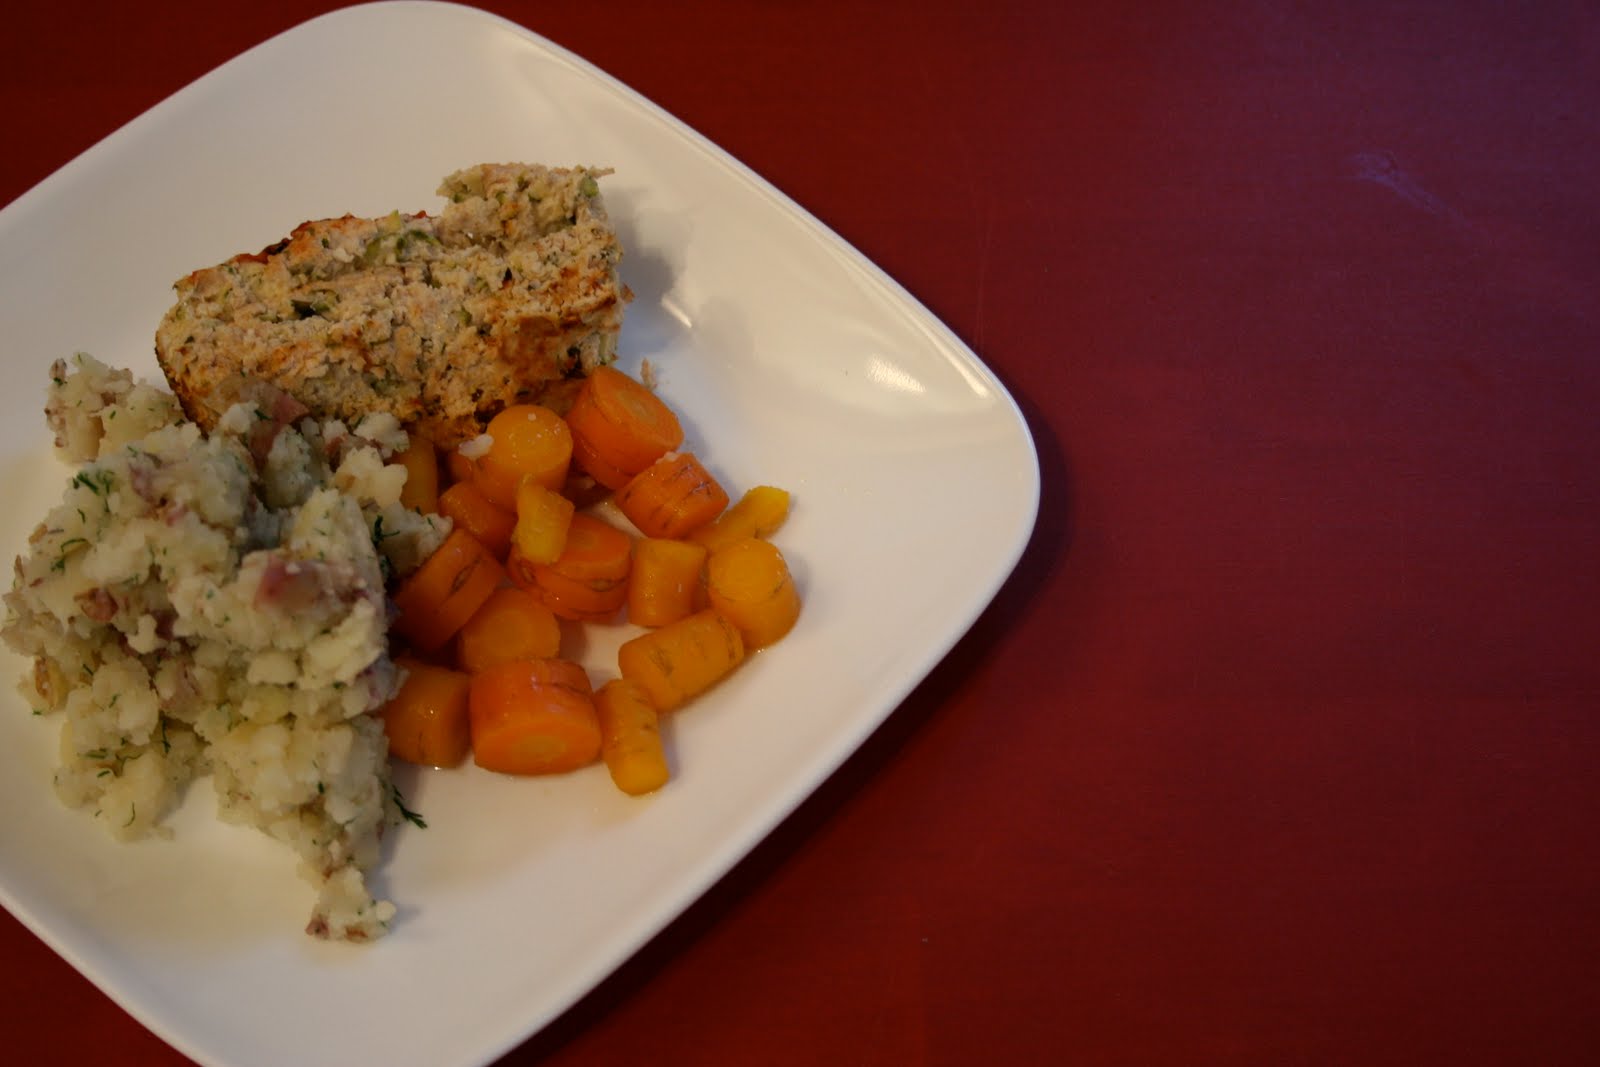
Feta Stuffed Turkey Meatloaf with Herbs
1 package of ground turkey
1 egg
1tbsp cornmeal (approx.)
fresh garlic, chopped
1/2cup grated zucchini
fresh rosemary, parsley, oregano, basil all chopped into small pieces
fresh ground black pepper
feta
organic ketchup
Mix the first turkey, egg, cornmeal, garlic, herbs, zucchini and pepper together in a bowl with your HANDS. Spray the inside of your loaf pan with olive oil or cooking spray and put half of the mixture in the bottom of the pan. Sprinkle some feta on top and cover with the remaining turkey mixture. Top with a squiggle of ketchup and cook for 50 minutes to an hour at 350F.
To accompany the meatloaf, I made garden potatoes mashed with loads of fresh dill and skim milk.
From the "Cooking Under the Arch" cookbook I made some honey glazed carrots. All that consists of is adding a little honey and margerine to your cooked carrots. These carrots were from our garden too!
JASON'S REVIEW: A+. Would eat again. Everything.
MY REVIEW: I am so pleased with my meatloaf!! Using fresh herbs makes a huge difference - so flavorful. The only thing I would do differently next time is sprinkling a little feta on top as well as in the middle. The honey glazed carrots basically tasted like candy.
It's just got really simple ideas on how to use the fruits and vegetables from your garden.
Last night, I made something called "Zucchini Ratatouille". Here's the recipe as written in the book:
These vegetables are straight from your garden, not dolled up with eggplant or mushrooms, though there is no law against those.
Cut in chunks into a baking dish: Zucchini, potatoes, carrots, onions, tomatoes. Drizzle with olive oil, fresh or dried oregano, garlic, salt and pepper. Cover and bake at 180C for 45 minutes. Top with cheddar or mozzarella and parmesan. Bake uncovered a few minutes until melted.
I followed this recipe pretty closely... the only thing that I found way off was the time! I had to leave it in there for almost 2 hours until the potatoes were cooked. I also added some sweet potato and cooked chicken from the night before. May I also add... the oregano and zucchini were from my garden! The potatoes and carrots were from someone elses garden. The joys of summer! This was a fantastic meal and great leftovers for lunch.
This evening I had to hang up my ring and get dirty! I made a completely original recipe that I am very excited about. It's all natural and completely gluten free. Drum roll please....
Feta Stuffed Turkey Meatloaf with Herbs
1 package of ground turkey
1 egg
1tbsp cornmeal (approx.)
fresh garlic, chopped
1/2cup grated zucchini
fresh rosemary, parsley, oregano, basil all chopped into small pieces
fresh ground black pepper
feta
organic ketchup
Mix the first turkey, egg, cornmeal, garlic, herbs, zucchini and pepper together in a bowl with your HANDS. Spray the inside of your loaf pan with olive oil or cooking spray and put half of the mixture in the bottom of the pan. Sprinkle some feta on top and cover with the remaining turkey mixture. Top with a squiggle of ketchup and cook for 50 minutes to an hour at 350F.
To accompany the meatloaf, I made garden potatoes mashed with loads of fresh dill and skim milk.
From the "Cooking Under the Arch" cookbook I made some honey glazed carrots. All that consists of is adding a little honey and margerine to your cooked carrots. These carrots were from our garden too!
JASON'S REVIEW: A+. Would eat again. Everything.
MY REVIEW: I am so pleased with my meatloaf!! Using fresh herbs makes a huge difference - so flavorful. The only thing I would do differently next time is sprinkling a little feta on top as well as in the middle. The honey glazed carrots basically tasted like candy.
Subscribe to:
Posts (Atom)